By adjusting the vertical tilt pins so that the SUPER PANATAR is in a level position (regardless of the angle of the projector), horizontal lines on the screen will appear straight when the picture is viewed from the main floor. These same horizontal lines will now appear bent when viewed from the projection booth. In theaters with a balcony it may be best to set the SUPER PANATAR so that a compromise of correction is achieved for the main floor and the balcony.
MOUNTING THE SUPER PANATAR ON THE PROJECTOR SECURING THE ACCEPTANCE BRACKET
Each SUPER PANATAR is supplied with an acceptance bracket, and securing this bracket to the projector head is the first step in mounting the lens.
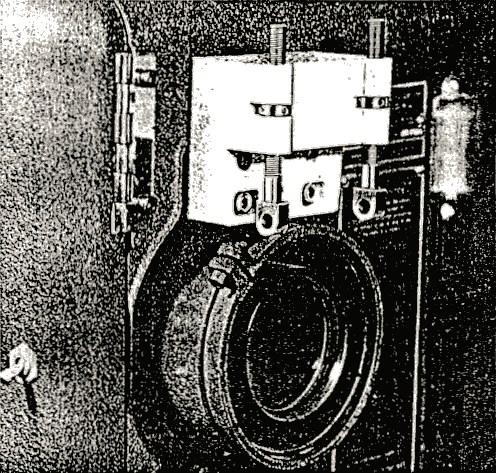
The bracket for mounting the lens to the projector comes in two sections. One of these, called the projector acceptance pad, attaches directly to the face of the projector in the following manner. Center pad above lens and drill face of projector (except Simplex X-L), using holes in pad as guides. Use suitable machine screws or bolts to firmly secure pad to projector (see figure two).
-5- |
|  |
|
The lens acceptance bracket is next placed on the projector pad. The positioning of the lens bracket on the projector pad controls the lateral tilt of the lens. It is here that clockwise or counter-clockwise rotation of the lens is adjusted so that vertical lines in the picture are parallel to the edge of the screen. As soon as this alignment is correctly achieved, secure the lens bracket to the pad by means of the bracket lock bolt. The acceptance bracket remains on the projector head permanently and the SUPER PANATAR can be mounted or dismounted at will by means of the removable pivot-pin.
After the acceptance bracket has been secured, the SUPER PANATAR may be mounted on the bracket by inserting the pivot pin through the ends of the vertical and longitudinal adjustment pins. With the lens still supported by hand, it can be seen how far to unscrew the vertical tilt pins or order to support the SUPER PANATAR properly
PROCEDURE IN MAKING PRELIMINARY ADJUSTMENTS
As stated previously, it is important to align the optical axis of the SUPER PANATAR with that of the projector, or vignetting and loss of light may result.
Throw the projector's beam of light into the SUPER PANATAR and adjust its position vertically and laterally until the cone of light is centered on the rear prism. (This adjustment is the most critical in the alignment procedure.) Finally, rotate the longitudinal adjustment nuts until the back of the SUPER PANATAR is as close to the projector as possible without actually touching.
FINAL ADJUSTMENT OF LENS AND LOCKING-OFF
Now that the SUPER PANATAR is in approximate position, the final adjustments can best be made by projecting a target frame or picture on the screen,
Assuming that the projector was centered on the screen before the SUPER PANATAR was mounted, rotate the longitudinal adjustment nuts until the projected image is centered on the screen.
If the projectionist is satisfied that the lens is well aligned in respect to both the projector and the screen, all lock nuts may be secured.
RAPID CONVERSION OF THE SUPER PANATAR FROM
2.66 TO 1.0 SQUEEZE RATIO TO OTHER RATIOS
Aside from the exceptional optical quality of the SUPER PANATAR, the most important feature of this lens is its ability to change aspect ratio in a matter of seconds. In other words, the lens can be rapidly adjusted for the projection of prints in whatever aspect ratio the print is supplied. It will be found that in most cases, prints are supplied for 2.66 to 1.0 projection. However, it may well be necessary for the projectionist to shift from 2.66 prints to 2 0 prints on the same program. Furthermore, it may be found desirable to shift from conventional 1.33 prints into the projection of 2.66 prints without removing the SUPER PANATAR. It is also possible to achieve novel effects in the projection of cartoons and titles, regardless of the aspect ratio of the film, by gradually adjusting the aspect ratio control knob. Any film which contains only geometric -6-
|
|
